You're viewing the support pages for our Legacy Tooling and, as such, the information may be outdated. Now is a great time to check out our new and improved tooling, and make the move to Questionnaire Builder 2 and Task Builder 2! Our updated onboarding workshop (live or on-demand) is a good place to start.
Welcome to Code Editors: Tutorials and Examples page where you will find a complete library of tasks designed to take you through the basics of using the Code Editor and show you examples of features implemented in Gorilla Code Editor.
Gorilla includes a fully-featured Code Editor, giving you the full power and flexibility to program your own tasks. In particular, it gives you the freedom to add features that are not well suited to the Task Builder tool, such as dynamic adaptivity, complex randomisation, rich feedback, games and special effects.
At heart, it is a blank canvas - you get gorilla.ready(), which is an entrypoint that guarantees that the whole page is loaded and ready. You get gorilla.manipulation(), which lets you know how the user has configured your task, and gorilla.metric(), which allows you to upload metrics.
Finally, you get gorilla.finish(), which tells Gorilla that you're finished.
These four functions give you the smallest interface needed to run a task within Gorilla. You still get all the same cloud features - experiment design in the tree, participant handling, metrics collection and storage - as long as you tell Gorilla when you have metrics and when you're finished, your code will integrate seamlessly.
For seasoned coders, the minimal interface above might be all you want.
You have access to the <head> so you can reference in your own libraries at will.
You could, for instance, use this to include jsPsych or a third party gaze detection or voice processing library.
For those who prefer a more streamlined experience, all areas of the Gorilla runtime system are available. You can use our rendering system of Handlebars templates, our layout system which provides resolution-independent sectioning of the screen, and our state machine system which allows you to easily and neatly implement your task as a Finite State Machine.
To see an example go to the Tower of Hanoi task. This has been built in the code editor. It uses our own 2D engine which is built on PIXI.
We have many exciting upgrades planned for the Code Editor, including the ability to use more of the Task Builder systems (such as the spreadsheet), and the ability to deploy games built in Unity.
If you would like more information about the Code Editor, please get in touch!
For those that don't want to code from scratch, the Task Builder and Questionnaire Builder editors allow you to add a small code snippet to customise their behaviour.
Some examples of tasks with scripts can be found on the Task Builder 1 Script List.
In the following sections you will find a series of introductory tutorials for Gorilla Code Editor.
The Sample Projects folder, Code Editor: Tutorial Tasks, contains a series of five tasks that wil introduce you to the basics tools for writing a Gorilla task in code. In the sections below, we describe the contents of the tasks and the concepts they introduce.
The 'HelloWorld' task introduces the basic commands that all code editor tasks in Gorilla will need. These are:
import gorilla, imports the Gorilla package into your code and allows you to use all the gorilla functions,gorilla.ready, contains the functions to be run or setup once the page is ready for content,gorilla.run, begins execution of the code editor task and contains the first function to be run,gorilla.finish, ends the task.In the HelloWorld task, we display the heading 'HelloWorld' on the screen. We use a JQuery selector to add this heading to the main div element on the page, with the id gorilla. Gorilla creates this for you in every task and this div will always be accessible. We also use a timeOut to execute the gorilla.finish() command after 5 seconds. gorilla.finish() ends the task and, if your task is part of an experiment in the tree, will return control to the tree and move the participant on to the next node of your experiment.
You can create a basic task like this from the moment you create a new task in the code editor - you don't need to add any other features to the code editor from the toolbox!
The previous task didn't allow us to have much control over where the content we added appeared on the page - not without adding a lot more commands to our jQuery selector. In the 'Hello World Templates' task, we introduce 'Templates' to our gorilla code task. To add templates to your task, click on the Toolbox and check the box 'Use Templates'. Templates allow you to control the placement and appearance of elements on your page in more detail. You can also replicate the appearance of Gorilla 'zones' from the Task Builder. This could be useful if you have an experiment using a mix of tasks from the builder and the code editor and want to keep the appearance of your tasks consistent for the participant.
We also introduce the following new Gorilla commands:
gorilla.populate, adds content to your page using your templates and additional arguments,gorilla.refreshLayout, makes sure that the content of our page is placed correctly.gorilla.populate functions in a similar way to the jQuery selector we had in the first tutorial task.
The contents of the template 'HelloWorld', along with any additional data in the third argument, is turned into html and added to the div with the id 'gorilla'.
In our HelloWorld template, we define two gorilla zones - one in the top half of our page and the other in the bottom half of the page.
You can define the placement of these zones using data-left, data-right, data-top, data-bottom.
These data points replicate the functionality of the handles on the zones in the gorilla task builder.
Rather than end the task using a timeOut, we add a button to the bottom half of our page labelled 'Finish' and bind a 'click' event to it using jQuery.
This event triggers the gorilla.finish() function.
In the first HelloWorld task, all of our code was located in gorilla.ready.
In this task, we put all of the code necessary to run our task inside the function 'DisplayHelloWorld.'
This function is then set to execute once gorilla.run is called.
Dividing the code of our task up into functions will allow us to create more complicated tasks in the future.
In the 'Display Stimuli' task, we're going to introduce displaying stimuli to the participant, as well as increasing the number of screens in our task and introduce an alternative to the timeOut from the first task. We will also introduce the use of the style file for the first time. The new gorilla functions added in this task are:
gorilla.initialiseTimer, allows us to use the timing features available in Gorilla,gorilla.populateAndLoad, an alternative to gorilla.populate useful for displaying images and videos,gorilla.addTimerSequence, an alternative to timeOut which gives us more control and functionality.In order to use stimuli and add more styling to our code, we need to check 'Use Styling' and 'Use Stimuli' in the Toolbox. In this task, we will display either a blue or orange circle to the user. If the circle is blue, we want the user to click on the circle. If it is orange, we want the user to do nothing.
To do this, we first need to upload our orange and blue circles.
On the stimuli tab, click the 'Add New Stimuli' button to upload new stimuli to your task.
In our 'trial' template we use stimuli image to include our stimuli on the page.
'stimuli' is an example of a handlebars helper.
In this case it takes the name of our stimuli and puts the address to that stimuli in place of the code in braces.
We pass in the name of the stimuli as part of the third argument in our populateAndLoad call.
gorilla.populateAndLoad works similarly to gorilla.populate except it waits for all the elements on the template to have loaded and report that they are ready before displaying the templates contents.
This is important if your task consists of larger images or videos that may take some time to buffer and load onto the page.
Our images aren't very large so we don't really need it in this case - we use it just as an example.
populateAndLoad takes as a fourth argument the function you want to run once the template has reported that it has finished loaded and is ready to be displayed.
In this task, we've added a click function to our stimuli image.
In this, we call 'iterateAndProgress' which decides whether we execute another trial or gorilla.finish().
As well as clicking on the image, there is the case that the participant may not click on the image, if the image is orange.
We use a 'sequence' to control this eventuality, creating it with gorilla.addTimerSequence.
A sequence has three functions that can be added to it.
.delay(number), adds a delay or pause to the current sequence. The actions below the sequence won't be executed until the delay finishes,.then(function), adds a function be run in the sequence,.run(), indicates that we have added all the elements to the sequence required and that the sequence should be run().We can add as many .delay and .then functions to the sequence, but the sequence must end with .run.
Sequences are useful when we want to chain a series of actions together such as displaying a fixation and then displaying a stimuli.
In this case, our stimuli executes iterateAndProgress after 3 seconds.
If anything happens that means you want to ignore the contents of the sequence, remember to call .cancel() on your sequence.
We do this in the click function for our image element.
In the 'Manipulations Recording Responses' task, we're going to demonstrate how you can control properties of your task from outside of the code, adding in manipulations as can be found in the task builder. We also add one of the most important components of any tasks, the ability to collect data, 'metrics' from the participant and upload them for later review. We'll also demonstrate some more advanced techniques for improving the way our task looks and runs.
The new Gorilla functions added in this task are:
gorilla.manipulation, to access manipulations that we set before running the task,gorilla.startStopwatch, gorilla.stopStopwatch, gorilla.getStopwatch, for using the stopwatch capabilities in Gorilla, typically used for measuring reaction time,gorilla.metric, to upload data gathered during your experiment.Manipulations are elements of your task that you will want to change prior to running the task but without having to rewrite your code. You may want to change how many trails the task consists of, what parts of your task you want to use or how easy/hard the task is for the participant. To begin using manipulations, you will need to add them via the toolbox! Once you've done that, click 'Add Manipulation'.
You'll then be asked to enter the details of your manipulation, all of which are explained in the manipulations window.
The part most important for your code is the 'Key'.
This is used to access the value of the manipulation in your task.
In this example, we've created a manipulation called 'Number of Trials' which we'll use to set the number of trials the participant will run through during the task.
We can access the value we set for this in tasks code using gorilla.manipulation and the key we set for the manipulation, 'noOfTrials' in this case.
This replaces the code form the previous tutorial task where we hard coded the number of trials for the participant to run through.
Next, we'll look at the stopwatch functionality.
At the beginning of our DisplayTrial() function, after setting up the page to be displayed we call gorilla.startStopwatch().
This starts the internal gorilla stopwatch which can be used to gather reaction time data.
When the participant makes a choice on the screen, we then stop the stopwatch using gorilla.stopStopwatch() and retrieve the current time using gorilla.getStopwatch().
This leads into the final addition to this task gorilla.metric.
Similarly to manipulations, in order to gather metrics from your participants, you first need to add the metrics tab from the toolbox and then define the metrics you want to gather.
This is simpler than for manipulations: all you need is to chose a key for the metric and then the title for the column that metric data will then appear in in your data download.
In the code, the call to gorilla.metric takes as an argument an object consisting of key/value pairs.
The keys are the keys defined on our metrics tab.
In the tutorial task, we've assigned the value of gorilla.getStopwatch() to the variable responseTime, which we've then assigned to the key responseTime in our metrics object.
In this task's code, you'll see that we've divided the code up into distinct functions: DisplayInstructions() which handles all of the code for our instructions page, DisplayTrial() for our trial page and DisplayFinish() for our finish screen.
There are some other functions too such as generateTrialNumbers(), which is used to randomly pick two numbers from the set 0 - 9 and iterateAndProgress() which is used to check if we've reached our maximum number of trials.
Primarily, this is just how I've chosen to arrange my code, fitting with my own style for writing and structuring my code.
There is another reason for this structuring, which will become apparent in the next tutorial task.
You can choose to arrange your code however you want, using whatever techniques you are used to.
For example, the code I've used to generate a random set of digits is of my own creation and not in anyway unique to Gorilla - you're free to right that however you want.
The 'State Machine' task is identical to the previous task except that we have replaced our main functions for the instructions, displaying trials and the finish screen with States using the StateMachine. This is a new method for structuring your task which adds additional functionality, making it easier to create more complicated tasks.
For this task we introduce a new package gorilla/state_machine and a new set of functions:
new stateMachine.StateMachine(), the command to create a new statemachine object,addState, to add a state to our statemachine,start, to begin running our statemachine,transition, to move between states in our statemachine.Using a statemachine is an easy way to divide up the logic and functionality of our task by defining certain 'states' that our task can be in. For example we have created an instructions state, in which we display the instructions to the participant. We can define everything that can and cannot happen in this state and govern how we move from one state to another.
To begin, and to create our life a lot easier, we create an enumerated list called State where we list the states we're going to create: Instructions, Trial and Finish.
Typescript see's these as the numbers 0, 1 and 2 but the names we've given them are much more helpful for us when writing the code.
Next we create our state machine var SM = new stateMachine.StateMachine(); and begin adding states to it using the addState function.
addState takes a set of arguments, the first being the number associated with the state we are created.
Using our handy enumerated list, this is State.Instructions,
We then pass up to three functions to our state: onEnter',onExit' and onEvent,
onEnter is called whenever the state is entered,onExit is called whenever we leave the state, usually via .transition,onEvent is called whenever an event is triggered in the task,
onEvent is an important example of how useful a statemachine can be as there may be some events that we want to be available only on certain states.
However, this is a more advanced example of the statemachine functionality which we won't go into in this tutorial.onEnter is where we will usually put all of our state code.
In this case we put almost the same code from our previous tutorial task except, where before we had a call to DisplayTrial we now call machine.transition(State.Trial).
machine is an argument in the onEnter function which represents the internal Machine of our state machine.
We can use it to move between states using .transitionon it.
It normally takes as an argument the id number of the state we want to move to.
Again, using our enumerated list we denote this as State.Trial.
Almost all the remaining code in our task is the same as before, except using machine.transition calls instead of our previous function calls.
Finally, in gorilla.run we use the Start function to indicate the state we wish to start in, the Instructions state in this case.
This is a simple introduction to the stateMachine and how you can use it to organise and run your trials.
It has a lot more capabilities and functionality than is demonstrated here however.
A much more advanced example is the Corsi Block Tapping task, where we make use of onEvent and onExit functions.
For Gorilla Code Editor examples see our Code Editor Example Tasks List.
For a full list of these examples along with a description of their functionalities see our Gorilla Code Editor Samples List.
It is possible to build simple games using the code editor. See our example game below:
Game Example: Tetris.
For more sophisticated and expert tool for game creation check out our new and exciting Game Builder!
If you have existing tasks written in jsPsych, or already use it for building your own tasks, this tutorial will help you learn how to simply use your jsPsych code in Gorilla.
To practice converting jsPsych code for use in Gorilla, explore our Code Editor: jsPsych Tutorial tasks.
Using your jsPsych task within a Gorilla experiment has never been easier. If you have existing tasks written in jsPsych, or already use it for building your own tasks, this guide will show you how simple it is to use your jsPsych code in Gorilla.
This guide is up to date as of jsPsych v7.0.
Importing your original jsPsych task into Gorilla can be done in 3 simple steps. You will need:
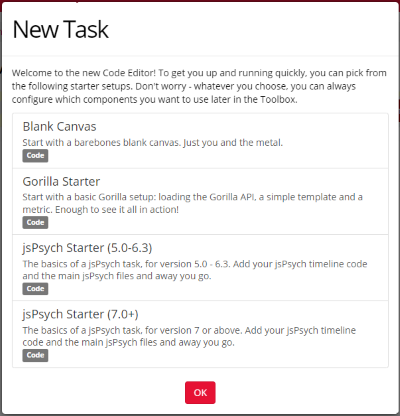
Step 1) Create a new jsPsych Code Editor task in Gorilla (1 min)
From inside your project in Gorilla, press Create and then select Code Editor Task. Give your task a name and hit create.
The Code Editor wizard will then ask you what kind of task you want to set up: Select jsPsych starter for whichever version of jsPsych you're using.
This template is preloaded with the basic script you'll need to get up and running.
NB: In the Code Editor you may see the error message "Accessors are only available when targeting ECMAScript 5 and higher". This error message is a known issue that we're hoping to fix in the future. However, they are just compiler complaints and everything should still work correctly! You can safely ignore this error message.
Take a look below at the Code snippet showing the basic integration:
Step 2) Add in your timeline (2-10 mins)
We've already set up the Gorilla and jsPsych code basics: importing the main Gorilla module, setting up the .ready function and a basic jsPsych.init function. Now you just need to populate your jsPsych timeline.
Not using the jsPsych timeline? The timeline is a really intuitive system for building your experiment from basic blocks that was introduced in jsPsych 5. You can learn more about it here: https://www.jspsych.org/overview/timeline/
We've already created a timeline variable for you and assigned it in the jsPsych initialisation function. All you need to do is push the trials you require to it. In most cases, this will be as simple as copy pasting your existing code.
Step 3) Add the jsPsych files you need (1 min)
These can all be uploaded in the Resources tab of the toolbox on the left hand side.
Make sure you also add script tag references to them in the Head tab. We've done this part automatically for some of the basic files that most tasks will use
And that's pretty much all there is to it! We've already linked the data collection to Gorilla and the end of the Task with Gorilla's own finish function.
To learn more about how to import your jsPsych Task into the Gorilla Code Editor check out our 'Hello_World' Tutorial.
Depending on how your task works and the additional features it requires, you may need to do a few more things to get everything working fully with Gorilla.
Add in stimuli In jsPsych, you usually need to provide the file address of your stimuli. For example, 'img/image1.png'. In Gorilla, you'll need to replace this with the URL Gorilla provides that links to where your image is stored.
The first step is to upload all of your stimuli to the stimuli tab. Then, you can retrieve the URL for the stimuli using the command gorilla.stimuliURL('myImage.png'): this would retrieve the URL for the image 'myImage.png'.
We also recommend that you take advantage of jsPsych's image preloading functionality - this will download all of the stimuli your task requires so that they can be instantly accessed during the task. You can see an example of how to implement this in our jsPsych Tutorial Task 'Simple Reaction Time Task'.
Add additional metrics
By default, we've included some of the metrics that jsPsych generates. You can see these in the Metrics tab of the jsPsych Starter Project.
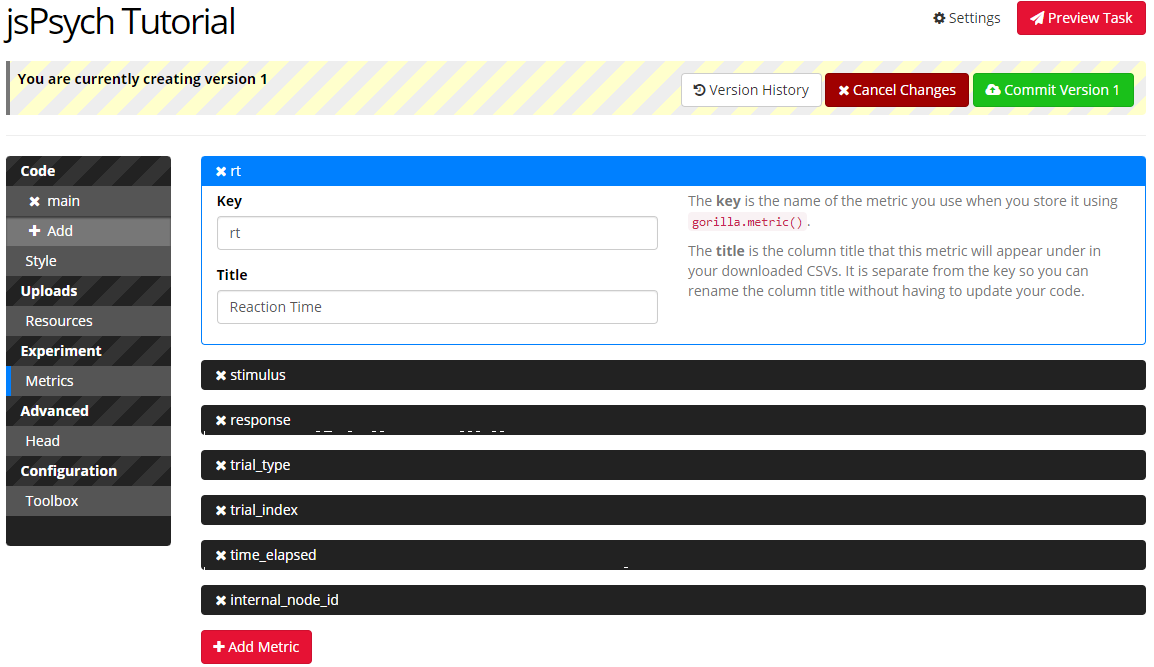
If you need to include more than this, you'll need to add new entries to the metrics tab. This way, Gorilla will know it needs to store them and you can assign an easily identifiable column name.
Don't already have a Gorilla account? Sign up now and get started building your jsPsych task today!