Questionnaire Builder 2 allows you to create surveys and questionnaires incorporating text, images and a wide variety of response possibilities. You can collect participants' responses, write them to the Store and let them answer different questions based on their responses. There is a very high degree of flexibility on the design of pages which you have complete control over!
Importantly, you do not have to touch a single line of code. The majority of classic questionnaires can be built in Questionnaire Builder 2.
Read on to see what each part of the tool does, and follow our Step-by-step Guide to build your first questionnaire and learn the tools quickly.
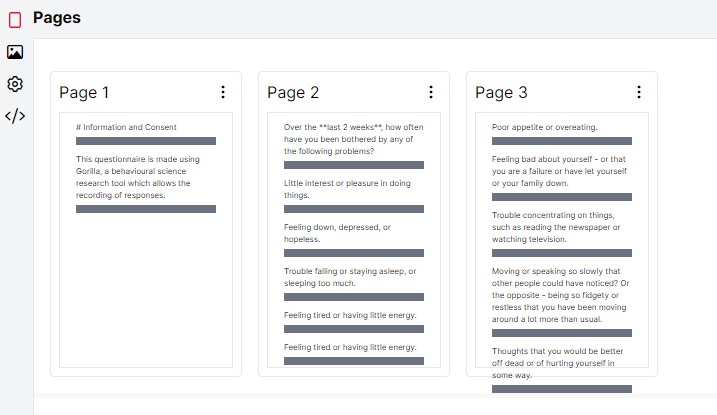
The Pages tab is where you configure all the elements of your questionnaire. A Page is simply a sequence of questions or text, similar to a page of a printed survey, but you can put as much or as little on it as you want. A Page can be a single object (which might suffice for simple instructions), but more commonly will be several objects in sequence (e.g. date entry, dropdown menu, text input, etc.).
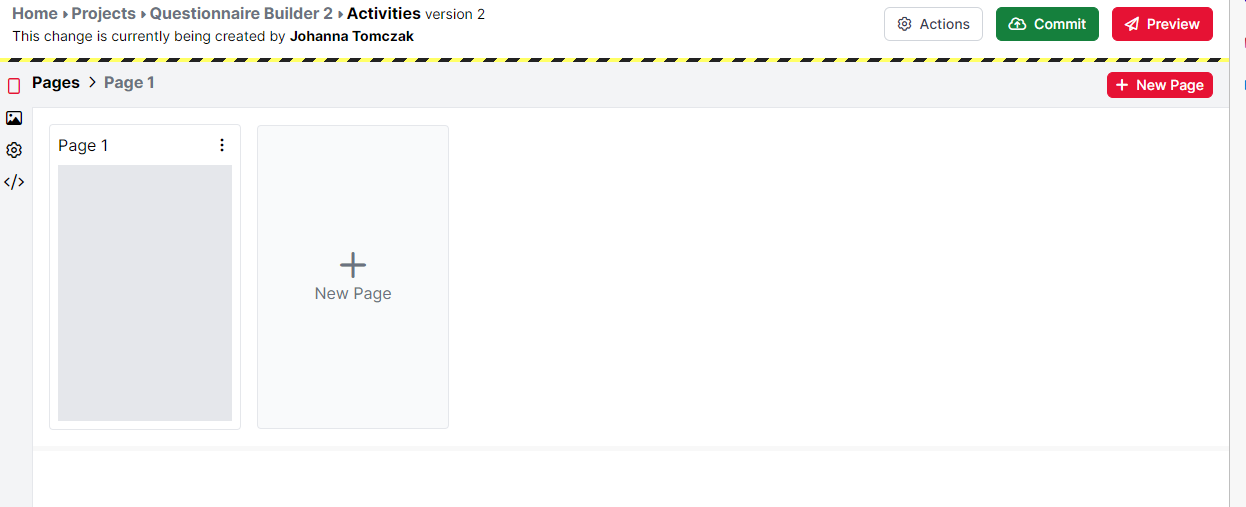
Start by clicking Edit on the right. This will create the second version of your questionnaire, as you can see in the second screenshot below.

You are now automatically starting to build on page 1 of your questionnaire, but you can also add more pages by clicking the New Page button.
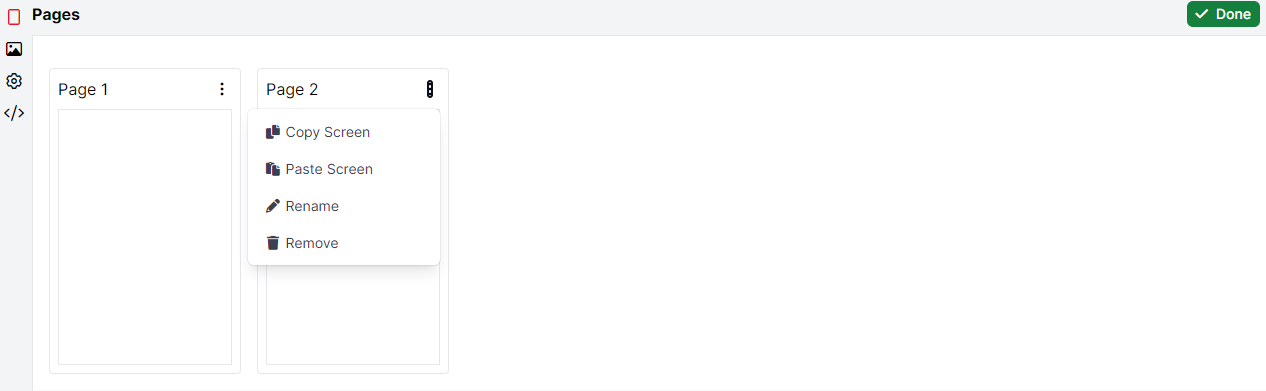
If you click on the white Page Order button shown above, you can then rename and reorder your pages (by dragging and droppping them), copy and paste them, or delete them if you no longer need them. You can also change their name. Once you are done, click on the green Done button.
This section is very similar to the way you use objects in Task Builder 2.
By clicking the Add Object button, you will have the choice between different objects available for questionnaires. Just choose the one you would like to add and click Create. For a full list of all objects, have a look at our Questionnaire Builder 2 Objects Guide.
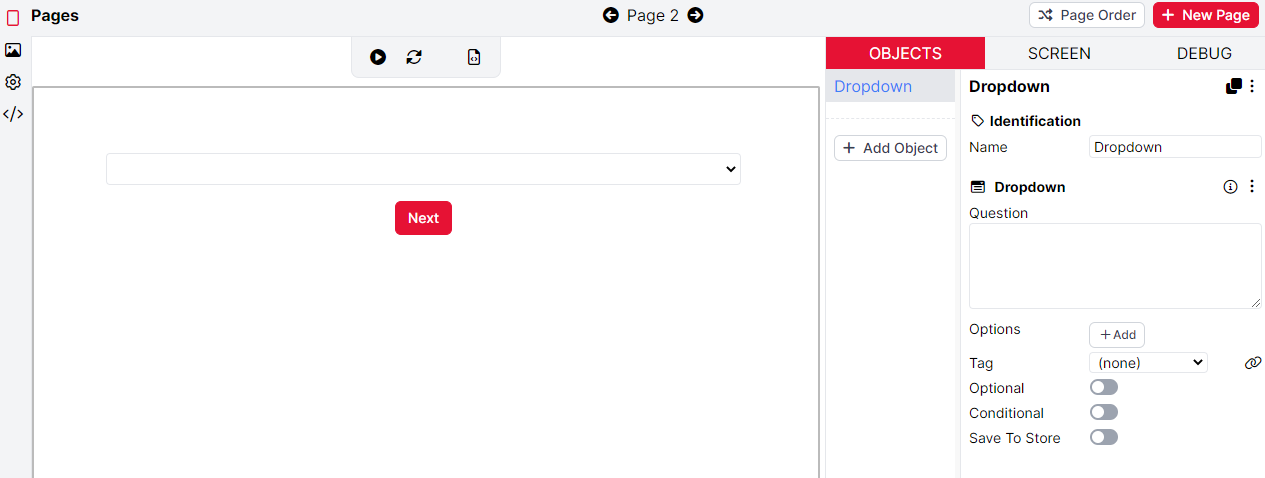
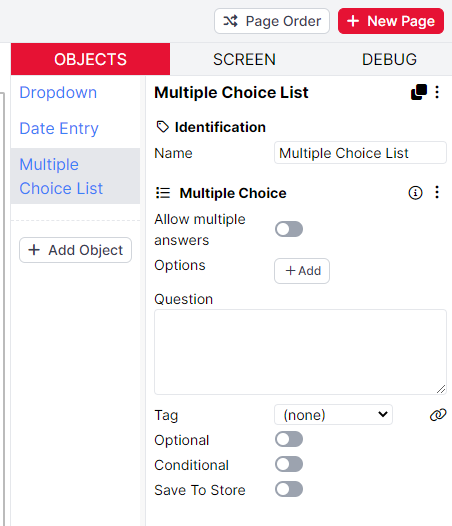
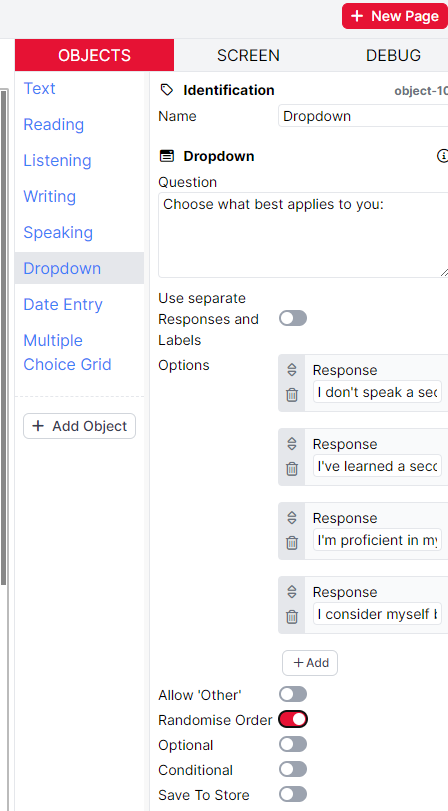
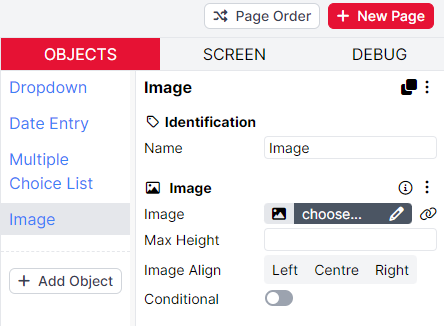
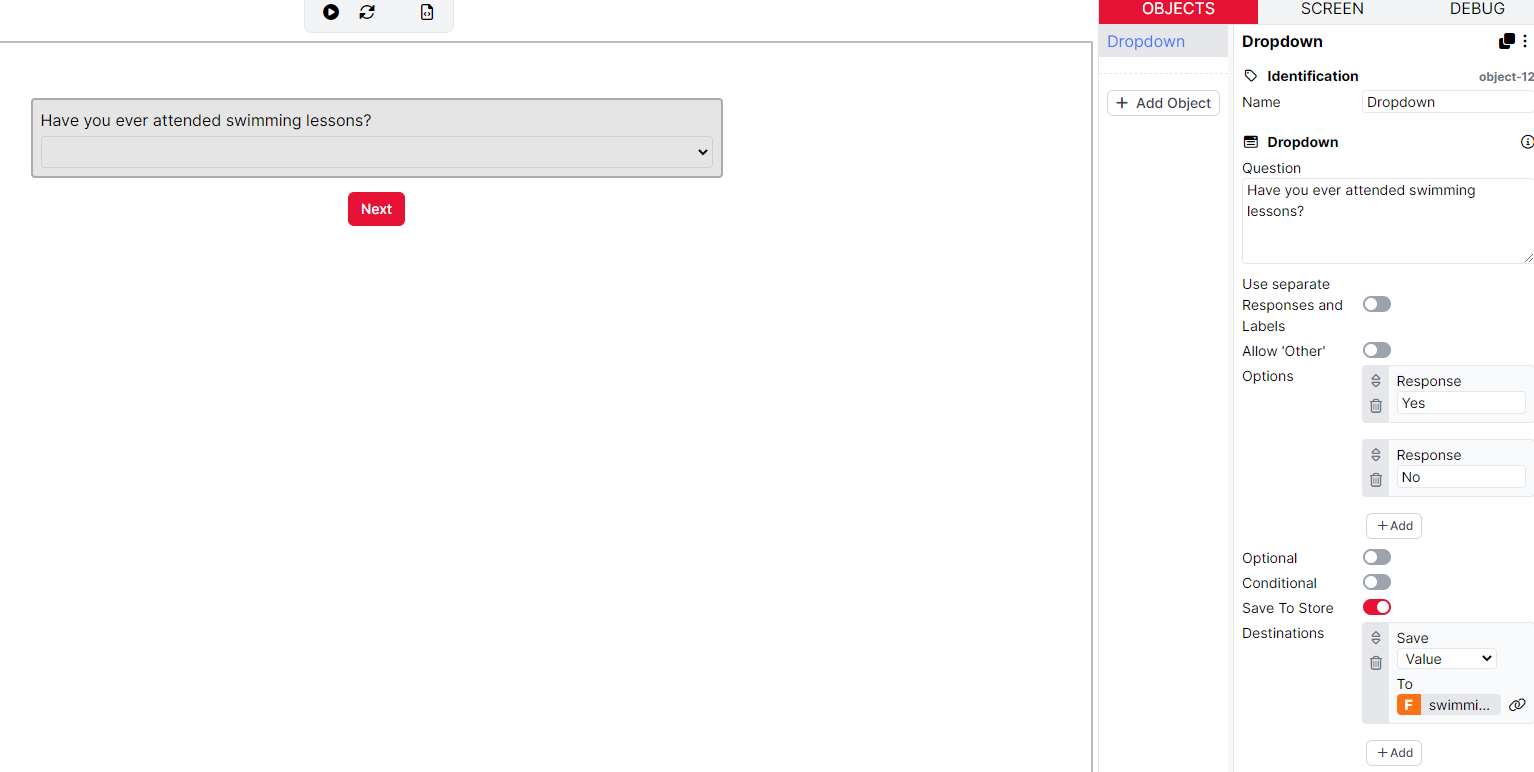
When you have added your object, your new object will now appear in the Object List, where you can edit its configuration settings (see image below for an example of the Dropdown object).
You can create a copy of an object by clicking the black Duplicate button at the top-right of the Object Editor. This will create the same object on the same page, which you can then edit. If you need the same object, but on another page, you can use the copy and paste functions under the 3 little dots instead. The video below shows these actions:
When you are adding several objects to one page, they will appear on your page in the order they appear in the Objects list. If you want to change their order, simply drag and drop them in the Objects list to fit your needs.
Once you have started building the pages of your questionnaire, you can preview how this will look to participants in two ways.
You can interact with a single page of a questionnaire by using the Play button, as shown in the video below:
In the video, you can see that once Play button is pressed, you can interact with the questionnaire objects on the page. In the Debug panel on the right, the recorded responses are shown. You can also view how the questionnaire will look on desktop and mobile devices by click on the different device icons at the top of the page.
At Gorilla, we also highly recommend previewing your survey in full, using the Preview button in the top-right corner of the Questionnaire Builder.
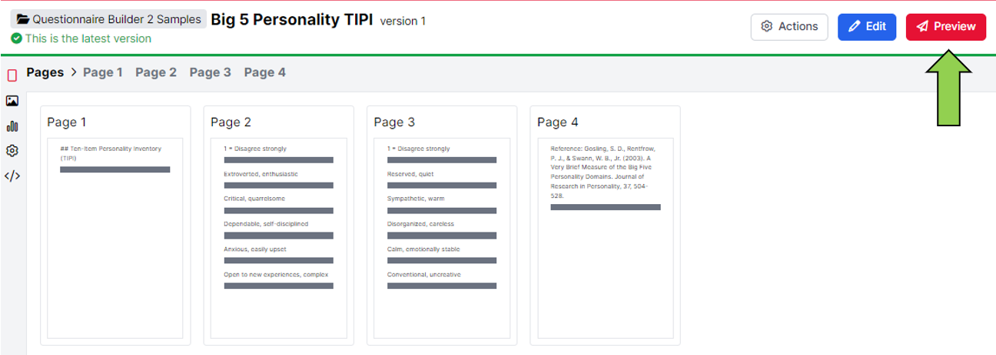
By clicking the Preview button, you can view the entire questionnaire from the perspective of a participant. At the end of the preview, you will be able to download the data from this preview. This is a great way to check that all the questionnaire responses are recorded in the way you expect, before launching your experiment.
Every Object has a toggle for the Conditional setting. This is where you are able to set up whether you want to hide or show this object, based on a set of possible conditions. Let's consider an example. Below you can see a screenshot of the Conditional settings for a Slider object, once you enable the Conditional toggle.
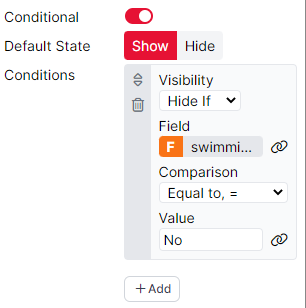
In this case, by default, the Slider will always appear. However, it will be hidden if our participants have answered with 'No' to one of our previous questions where we asked whether they had taken swimming lessons at one point in their life. As we saved the answer from the swimming question to the Store, we can now retrieve it here and implement a skip logic (for participants who haven't taken swimming lessons) and a display logic (for participants who have taken swimming lessons).
Tutorials that show this feature
Sometimes, you want to advance participants from one page to the other based on a manipulation or a response saved to the Store. By using the Branch toggle in the Screen tab you can set up a skip logic on every page and for every object you need this setting for. Below you can find an example where we are using the response from the Dropdown menu to the question whether participants ever attended swimming lessons.
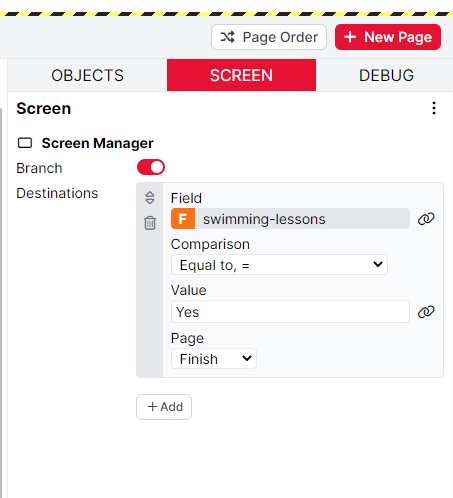
This set-up enables use a skip logic to branch participants to the end of our questionnaire ('Finish'), if their answer to the question was 'Yes'. You can also use numerical values for the comparison to the set value. If there answer was 'No', they will continue with the normal flow of your questionnaire.
Tutorials that show this feature
There are three types of randomisation which are possible in Questionnaire Builder 2. You can randomise entire pages, individual questionnaire items or the answer possibilities within a questionnaire item.
You can also check out our Randomisation Tutorial.
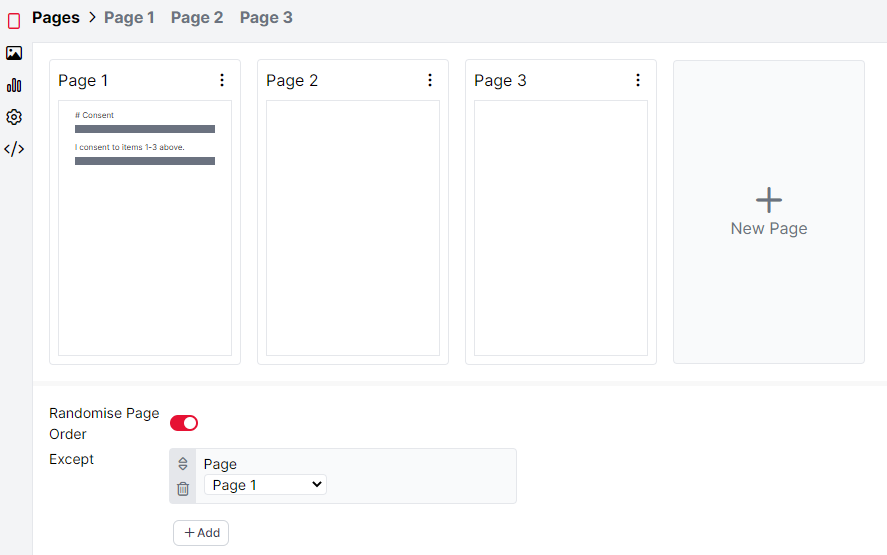
In the page view, at the bottom, you can see the toggle Randomise Page Order. Switched on, this will allow you to display all your pages in random order. If you want to make some exceptions (i.e. some pages should not be randomised), you can add those to the Except field.
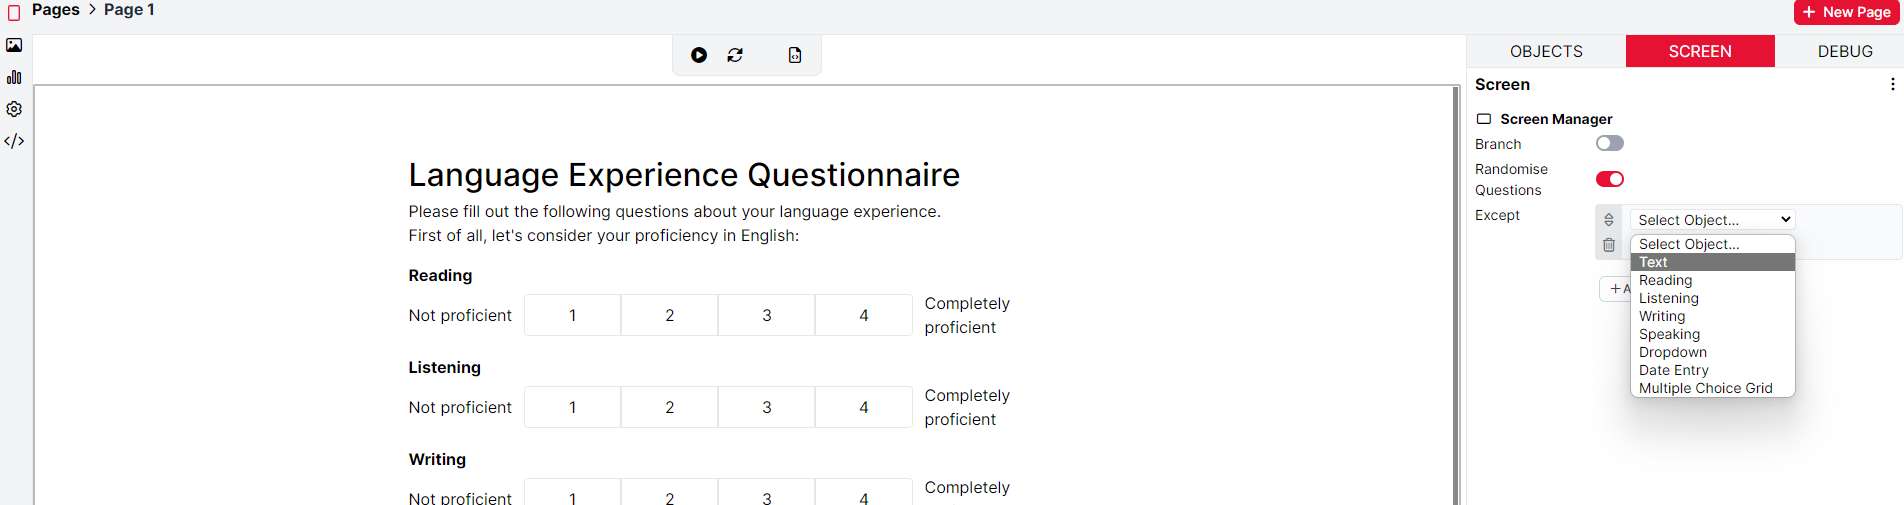
In the Screen tab of each of your pages, you can see the toggle Randomise Questions. Switched on, this will allow you to display all your questions (i.e. objects) in random order. If you want to make exceptions (i.e. some questions should not be randomised), you can add those to the Except field.
Some questionnaire objects also allow you to randomise the response options, so that these appear in a different order for participants. If this is the case, you can find the setting within the settings of the object. Below, you can see an example of the Dropdown object with the randomising response options switched on.
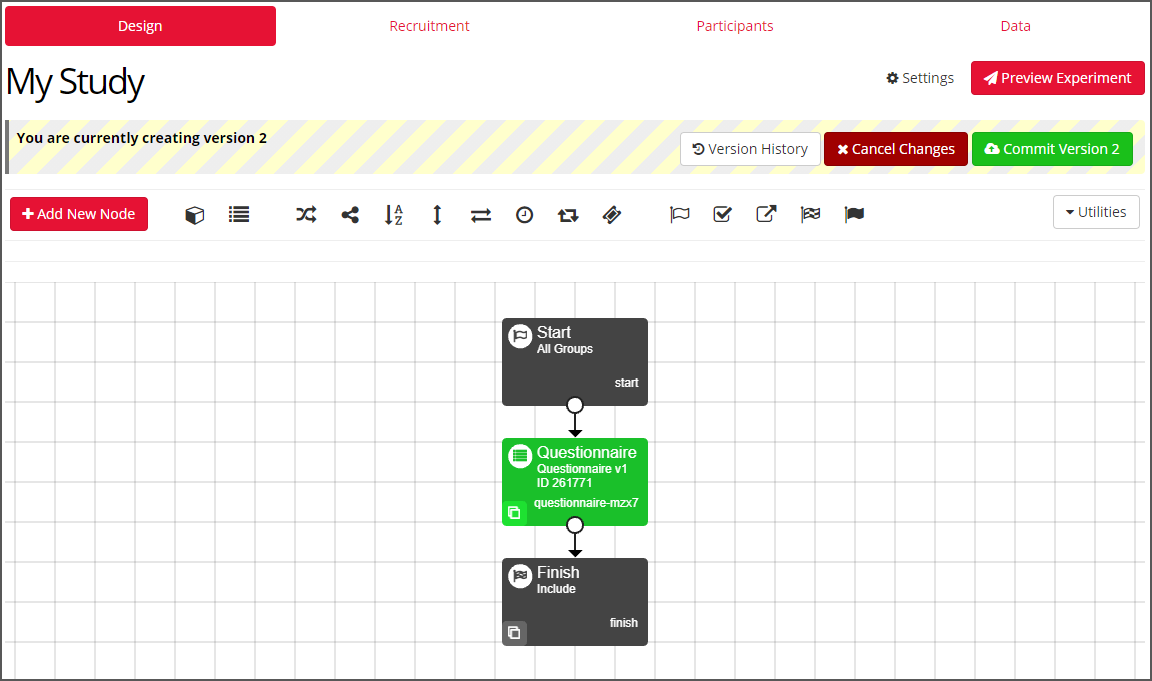
To send a Questionnaire to participants, you need to add it to an Experiment.
The Experiment Tree forms a framework around your Questionnaire that allows participants to enter the Questionnaire. From the Experiment Builder Recruitment Tab, you can control entry of participants into your Experiment. From the Participants tab, you can manage your list of participants, and from the Data tab, you can download the responses to your Questionnaire.
Check out our guide for adding questionnaires to experiments for more information!
Stimuli are any media files (images, audio, video, etc.) which you can present to participants during your questionnaire.
You can add, delete, and manage stimuli on the Stimuli tab. To add stimuli, click the Add First Stimuli button or the Add Stimuli button for any subsequent stimuli.
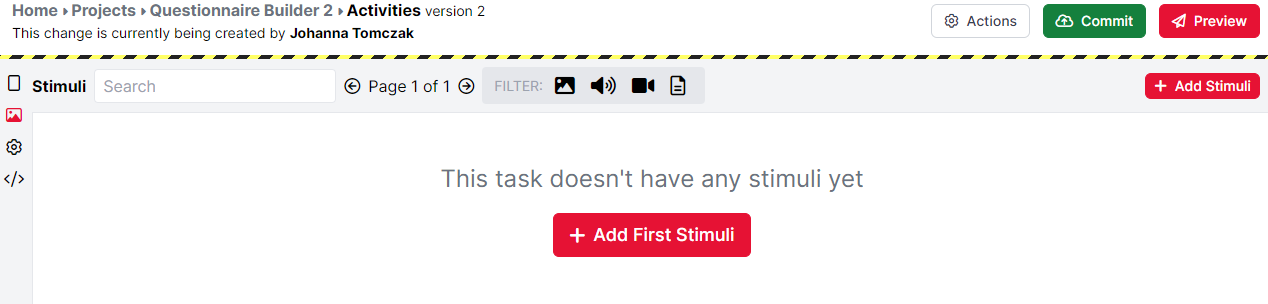
Browse the files on your computer and select the stimuli you want to add. Once the stimuli have uploaded, you will see a preview of each stimulus. Stimuli are shown 10 to a page. To navigate between pages, use the arrows at the top of the Stimuli tab. Click 'Remove' next to a stimulus to delete it from your task.
You can search for specific stimuli by typing part of the filename in the search box at the top left. You can also filter stimuli by type (image, audio, video, and document) using the Filter icons at the top of the Stimuli tab. Active filters are displayed in red, while inactive filters are displayed in black. Toggle whether a filter is active or inactive by clicking it.
Now that you have created an object and uploaded your stimuli, you can then use the 'choose...' dialogue to pick the stimulus you want to display in your object configurations.
In Questionnaire Builder 2, we now have a Scoring tab where you can calculate participants' scores without needing a line of code!
Samples that use this feature
Generalised Anxiety Disorder (GAD 7) - Uses a single score.
Barratt Impulsiveness Scale (BIS-11) - Uses multiple scores.
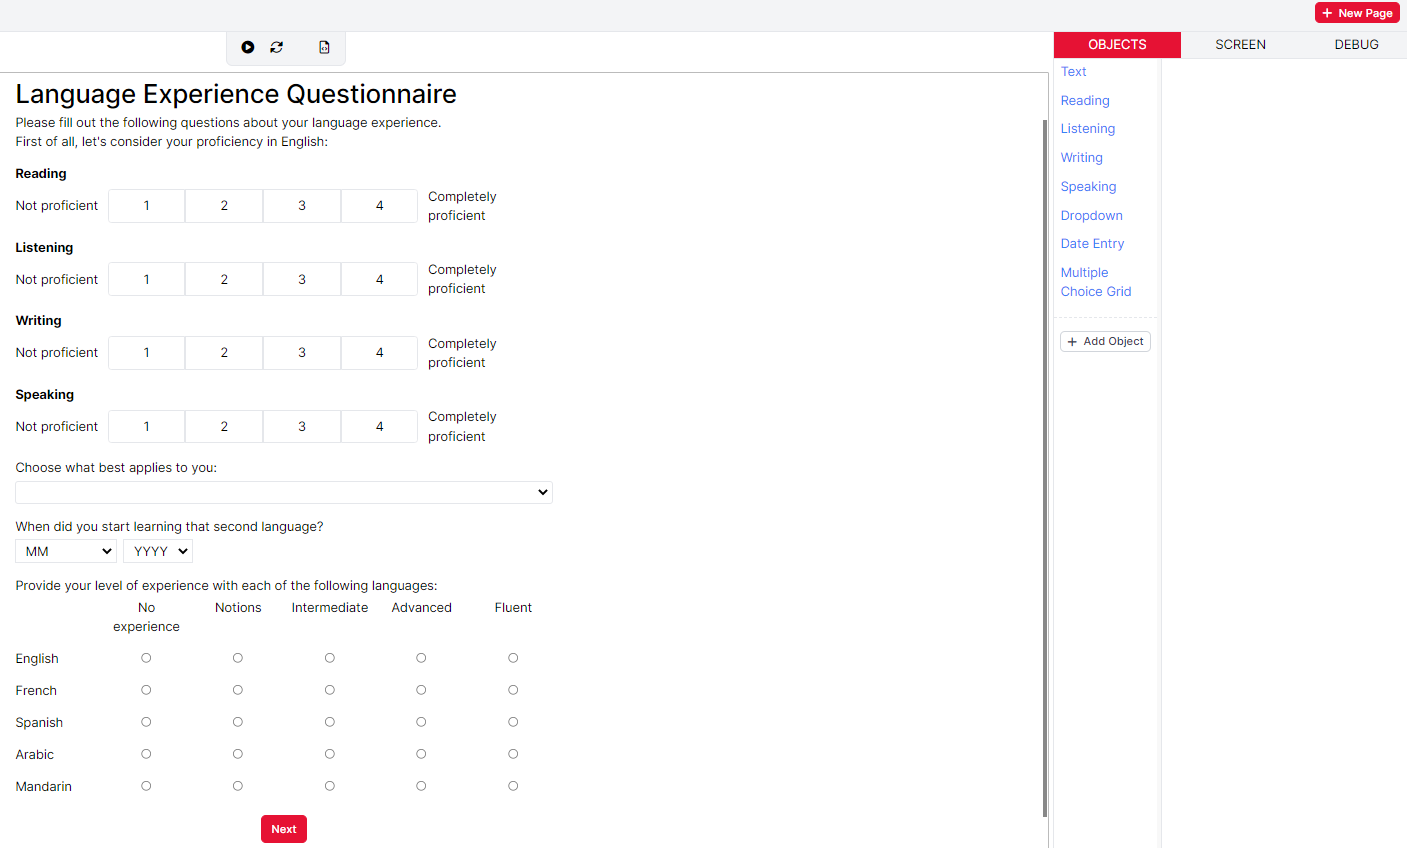
First, let's look at an example questionnaire. The image below shows how we could ask our participants about their language experience. We want to use this questionnaire to calculate a language proficiency score for our participants.
Once you have created a questionnaire, navigate to the Scoring tab (icon looking like a bar chart) on the left side. Click on 'New Score' and enter a name for the score you want to calculate. If you want to calculate several different scores, this helps you to keep track of which one is which.
Now, you will be able to choose which pages of your questionnaire to include in your score calculation. In our example, as we only have one page, we decide to include it. If you have several pages, they will all appear here.
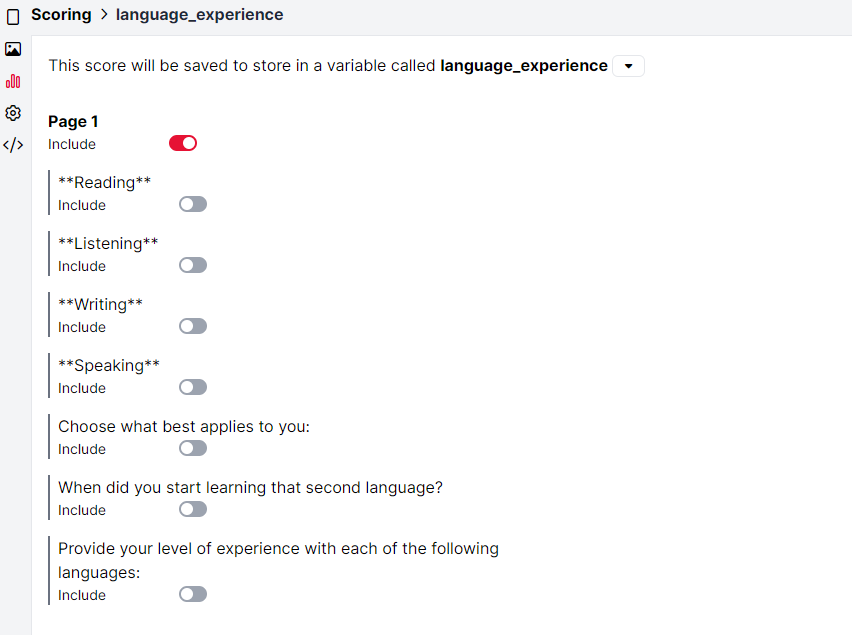
After having included the page(s) which you need to calculate your score, you can choose all individual questionnaire items you want to include.
Starting with including the first two items of our questionnaire, which are both Rating Scales, we can now define a score for each of them.
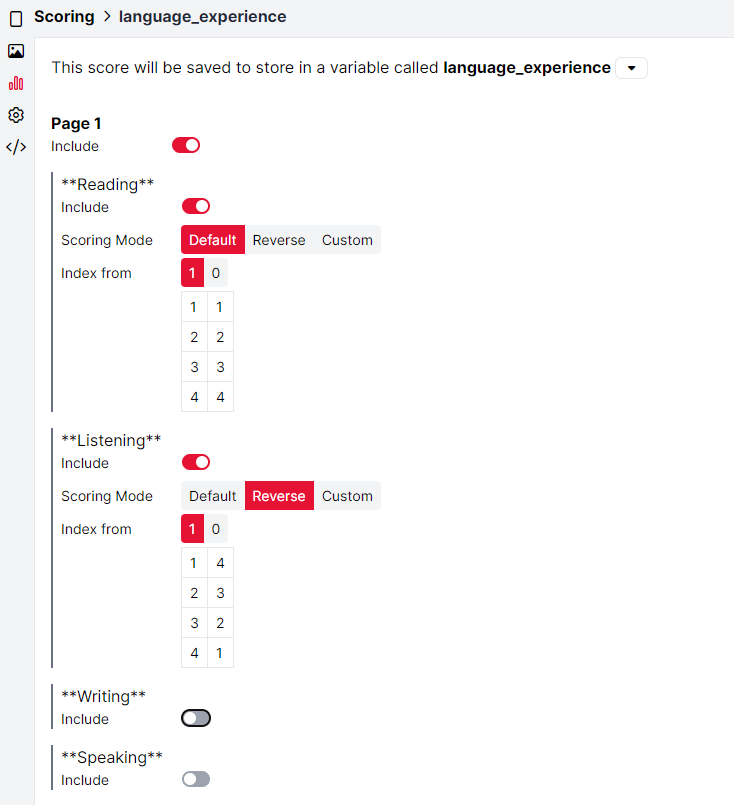
By default, the answers to the Reading question (1, 2, 3, 4, shown in the column on the left) are scored in chronological order, starting from 1 (shown in the column on the right). In other words, at the moment, the score is matching the label of the response. We could also decide to start counting from 0, by choosing the Index from 0 option.
If we wanted to score participants answers in the opposite order, we could choose the Scoring Mode 'Reverse'. This has been done for the next question about participants' listening ability. This way, in our example, the answers 1, 2, 3 and 4 would be matched with the scores 4, 3, 2 and 1, respectively.
We could also apply a custom score, if we wanted to define individual values for each response. This is useful if some answers should account for significantly more points than others.
So far, so good, let's make this a bit more complicated. For example, consider the Multiple Choice Grid object from the questionnaire above, where we ask participants about their proficiency in several different languages. We could score all languages in the same way, but we could also score them differently. For the latter, choose the Scoring Mode 'Individual'.
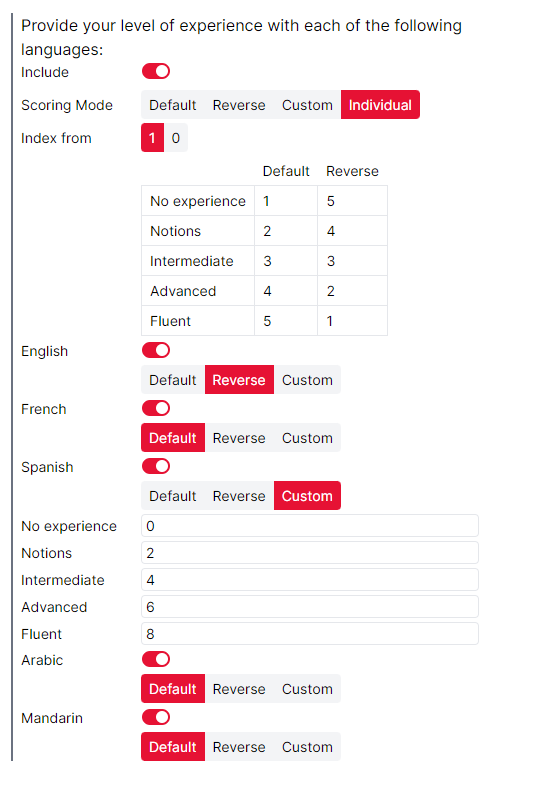
You can now decide, for each individual row, whether things should be scored by default, reverse scored or whether you want to apply custom scores. In the example, we have chosen to score answers to English in reverse mode, answers to French in default mode and answers to Spanish in custom mode. You can see that the custom scores for Spanish are higher than those for the other languages, so speaking Spanish leads to a higher score than speaking French, for example.
Manipulations allow you to change settings on your questionnaire from within the experiment tree. You can use manipulations to implement between-participant conditions in your questionnaire.
To add a manipulation, navigate to the questionnaire setting you want to manipulate. For example, imagine you want to use a manipulation to vary the labels of your slider object between participants. Go to the relevant page and navigate to the Slider object and toggle Add Labels. Then click Bind (the link icon to the right of the setting).
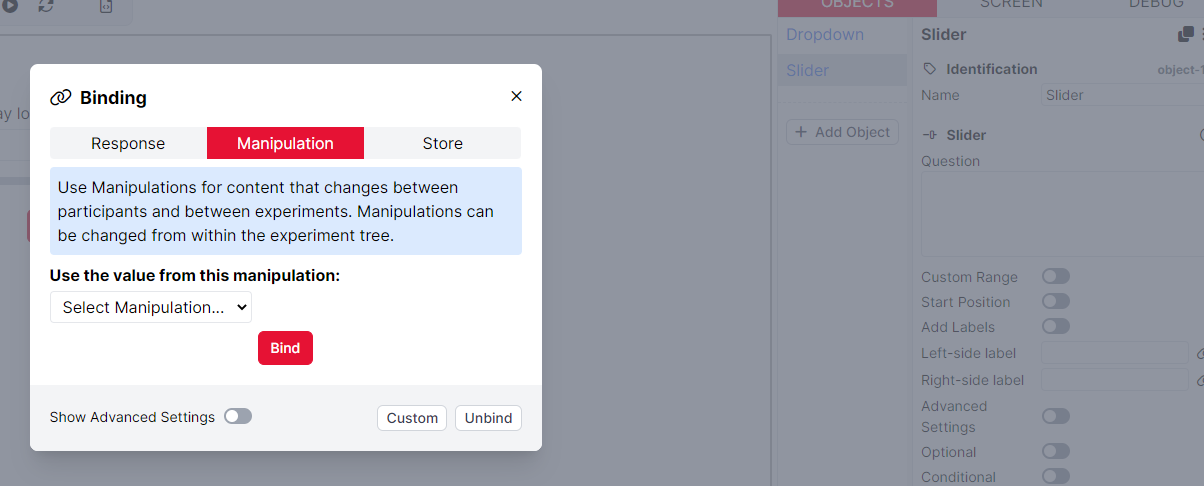
You can find more information about binding to manipulations, including how to configure manipulations in the Experiment Tree, in our Binding Guide.
To view all manipulations set up on your questionnaire, go to the Settings tab on the left and click Manipulations. Here, you can delete any manipulations you are no longer using by clicking the bin icon on the left of each manipulation. You can also add a description for your manipulation, set its Label and Key, define Options, and set up a default value.
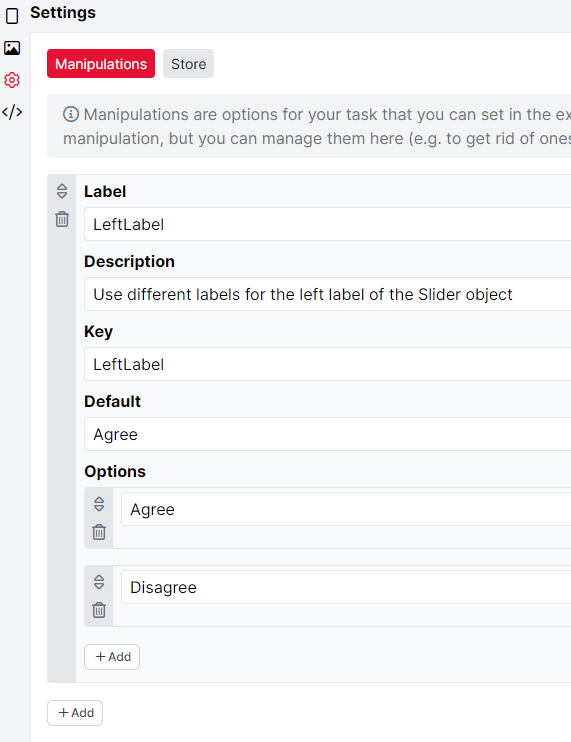
Label: This is the name of your manipulation, as it will appear in all configuration menus.
Description: Use this to add a description of your manipulation and its possible values.
Key: This is the name of your manipulation, as it will be referred to in Gorilla's underlying code. By default, the Key is identical to the Label. You will need to use the Key if you refer to your manipulation within a script.
Default: Use this to set a default value for your manipulation. This value will be used if you do not set a value manually within the Experiment Tree.
Options: Here, you can define options for the values of your manipulation. If you define options, these options will show up as a dropdown menu when you set up your Task in the Experiment Tree. If you do not define options, then you will enter the value of the manipulation in a free text field when you set up your Task in the Experiment Tree.
The Store is a place to save participant data that you want to use later in the questionnaire or the experiment: for example, participants' responses to specific questions. Each piece of data that you save in the Store will be saved in a named Field, so that you can retrieve it and use it later. If you're already familiar with Questionnaire Builder 1, this is analogous to what was previously called embedded data.
For example, imagine that you want to save participants' response to the question whether they have ever taken swimming lessons in their life. Navigate to the object (the question) where you collect participants' responses. In the example below, we are using a Dropdown object with two response options (Yes or No). You can then Save the data from this question to the Store, by creating a new Field under which the data will be saved.
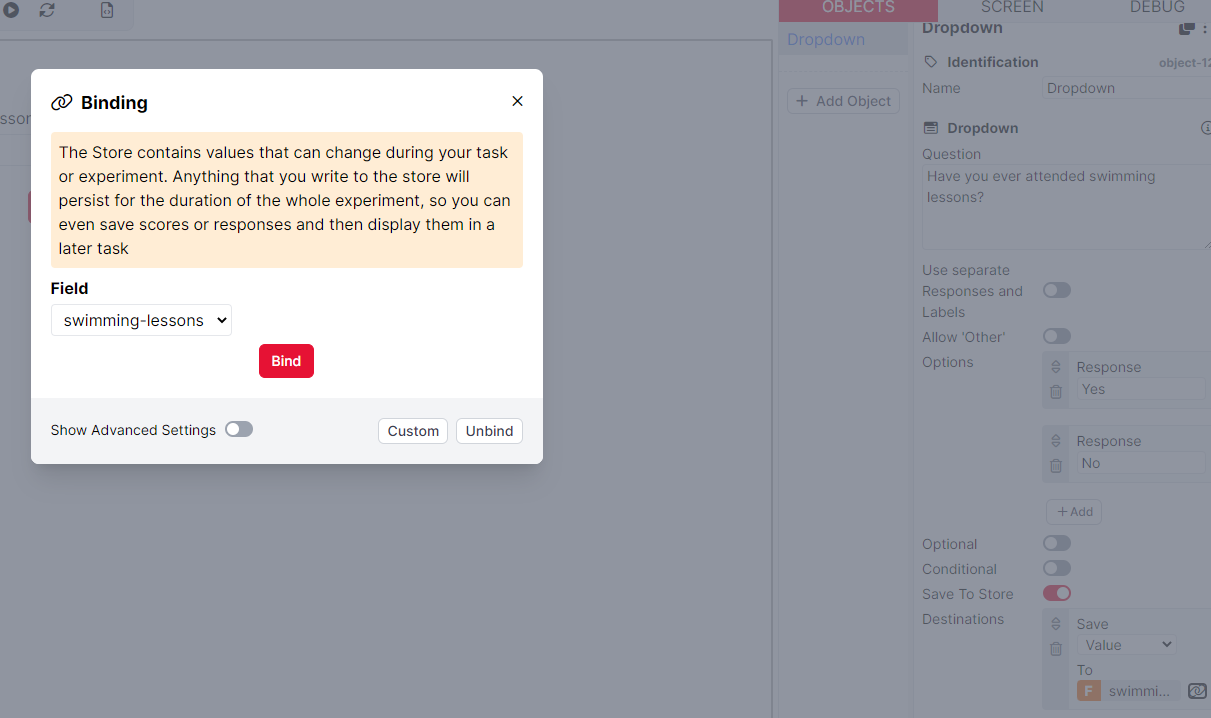
This will appear under Destinations now, preceded by an orange F (which indicates that you have created a Field in the Store).
Now, navigate to the page where you want to retrieve and display the values of the Store field you created earlier.
There are two ways to retrieve fields from the Store and display their values on your questionnaire page:
Directly bind an object to a Store field. You can find how to do this in the Binding Guide.
Incorporate Store fields within a Markdown text object. This is the easiest way to show participants their responses.
Add an object to your screen containing a Text component. In the component's Raw Text field, type the text you want to display to the participant. To incorporate a Store field, use the syntax ${store:myField}. For example, 'Hello ${store:firstName} {store:lastName}'.
In the Customisation tab, you can add a Back button, change the text of the Next button, and set your questionnaire text to display in right-to-left mode.
Here, you can customise the label shown on the Next button at the bottom of each page of your questionnaire.
Toggle this setting on if you want to show a Back button that allows participants to return to previous pages of your questionnaire. You can also customise the label shown on this button.
Toggle this setting on if you want the text on your questionnaire pages to be displayed from right-to-left.
As of Jan 2023: Coming soon!