You're viewing the support pages for our Legacy Tooling and, as such, the information may be outdated. Now is a great time to check out our new and improved tooling, and make the move to Questionnaire Builder 2 and Task Builder 2! Our updated onboarding workshop (live or on-demand) is a good place to start.
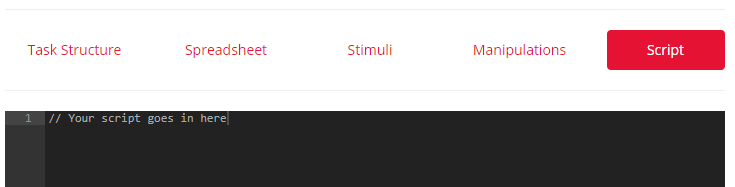
The Gorilla Task Builder allows you to add your own scripts to customise its behaviour. There is a section along the top called Script - this is where you can add your own code:
The Task Builder Script is designed to work alongside existing Task Builder functionality - your Task Structure and Spreadsheet will still be the key driving forces for the Task. If you need more complete control over how the task is operating, such as changing completely how content is structured and presented, you should use the Code Editor instead. If you can build most of your Task using the existing Task Builder GUI, but just need that bit of extra content or flexibility, then the Task Builder Script is the right choice for you.
Note that Task Builder 2, our new generation task builder, now includes many features built-in that used to require scripting. Check our How-To Guide to see if what you want to do is possible! We have also updated our Scripting Samples to note which examples can now be done natively in Task Builder 2.
The Task Builder offers you a number of different Hooks - these are places in the task builder functionality where you can effectively insert your own code. For example, you can add a bit of your own code at the point where the spreadsheet is being initialised, so you can reorganise the rows or insert new ones. You can add your own code at the beginning of each screen, to customise how a particular zone is set up.
The first step to writing a script is to look over the available hooks and work out where you want your code to be inserted. You can use multiple different hooks if you need to (although you can only use one instance of each hook - see the Hooks page for more information). You also have access to the regular Gorilla API to access embedded data etc if you need to.
A typical script might look something like this:
Note that gorillaTaskBuilder and gorilla are already included for you and are in scope - you don't need to require() them or anything.
For an introduction to basic concepts in JavaScript, see our video below:
You're viewing the support pages for our Legacy Tooling and, as such, the information may be outdated. Now is a great time to check out our new and improved tooling, and make the move to Questionnaire Builder 2 and Task Builder 2! Our updated onboarding workshop (live or on-demand) is a good place to start.
There are lots of example Task Builder scripts on Gorilla, ready for you to copy and adapt for your own projects:
You're viewing the support pages for our Legacy Tooling and, as such, the information may be outdated. Now is a great time to check out our new and improved tooling, and make the move to Questionnaire Builder 2 and Task Builder 2! Our updated onboarding workshop (live or on-demand) is a good place to start.
Hooks are the main way you insert your own functionality into the task builder. They are executed in a very specific order:
When the task starts to load, the first Hook that will be run is preProcessSpreadsheet. Following this, Gorilla will then randomise the spreadsheet according to the content of the randomise_blocks and randomise_trials columns. Then, the postProcessSpreadsheet Hook will be executed.
At the beginning of each screen, concurrently with the contents of the screen being loaded, the Hook onScreenStart will be executed.
Whenever an answer is given by a participant is marked (for zones that immediately generate a metric upon answer entry), the Hook isCorrect will be executed.
If the screen is advancing - say from a response being given while sudden death is on, or as a result of pressing a continue button or a timelimit expiring - isCorrect will run if there are any passive response zones on the screen. Following this, onScreenRedirect will be executed.
Finally, once the screen has finished closing up and Gorilla is preparing to move on to the next screen, the onScreenFinish Hook will be executed.
Note: Your script can incorporate multiple different Hooks, but you can only use one instance of each Hook. If you try to use, for example, two copies of the onScreenStart Hook in the same script, the second copy will overwrite the first. For an example of how to combine multiple actions inside one Hook, see our Combining Multiple Scripts example.
You're viewing the support pages for our Legacy Tooling and, as such, the information may be outdated. Now is a great time to check out our new and improved tooling, and make the move to Questionnaire Builder 2 and Task Builder 2! Our updated onboarding workshop (live or on-demand) is a good place to start.
While this is probably the question most people reading this page are asking, it's also the hardest question to answer.
What Hooks are appropriate for your Task and the additional functionality you want to create will depend greatly on the kind of task and the kind of functionality you want to implement. However, there are a few vague guidelines we can offer which will hopefully help you along the way.
You should use the preProcessSpreadsheet or postProcessSpreadsheet Hooks. Which one of these you choose will depend on whether or not your alterations can take place before or after Gorilla has executed its own randomisation based on randomise blocks and randomise trials. Most of the time, you can use postProcessSpreadsheet.
In terms of how you use it, this will depend a lot on your requirements. However, most processes will usually require the following steps:
First, collect the components you are interested in. You will initially parse through the existing spreadsheet, picking up the components you need to do something with. This could be the contents of a column you want to randomise, or a set of trials you want to shuffle or select from.
Next, manipulate the contents in the way you require. This could involve shuffling them, selecting a reduced set of them, or adding additional or altered content to them.
Finally, create a new spreadsheet and parse your new/altered content back in. In some way, you'll be mirroring the selection process you used initially. For rows that don't satisfy your selection process, just add them straight to your new spreadsheet. For rows that do, you'll need to replace them, or content within them, with the new content you have created.
You should use isCorrect to implement your own scoring system.
You should use onScreenRedirect to implement your own system for deciding what screen/trial the participant should view next.
You should use onScreenStart. If you want to make changes to your task's appearence, how it runs or how the participant can interact with it, this is the Hook you should start with.
In terms of how you use it, this the broadest one and the hardest to advise on. Firstly, have a clear understanding of what you want to change or need to change (or add). How does this fit in with existing zones and content? Have you checked with Gorilla Support that the functionality you need isn't already supported?
Next, if you need to alter existing zones, make sure to give them an easy-to-remember name by going to the screen where the zone is present, clicking 'Edit Layout' and then clicking on the zone you will need to manipulate. In the Zone Name field, type a name that you will remember easily and immediately add that name to your script. You will be able to use the zone name as a jQuery selector. Zone names are added as a class in the HTML. Remember that to select a class in jQuery, you need to precede the name of the class with a dot, i.e. .name
At the same time, pick up the name of the display that zone is in and the number of the screen. Screen numbering starts at 0 (the first screen in a display is the 0 screen.) If you only want new functionality to apply to a certain display and screen, you will first need to check you are on that display and screen by comparing your desired values against row.display and screenIndex respectively.
Go you! We like tasks that really push the boundaries of what Gorilla is capable of. You can define any number of the Hooks within a script file. Make sure to define each Hook separately (NOT nested within each other) and only once. Remember that you don't choose when a Hook is executed, only what it does when it is executed. If you need one Hook to do a lot of things, you'll just need to create a very large function!
You're viewing the support pages for our Legacy Tooling and, as such, the information may be outdated. Now is a great time to check out our new and improved tooling, and make the move to Questionnaire Builder 2 and Task Builder 2! Our updated onboarding workshop (live or on-demand) is a good place to start.
onScreenStart is a hook that is run when a new screen is loaded and ready to start. Any code that you place in the onScreenStart hook will be executed only when a new screen starts.
Provided variables
onScreenStart provides you with five variables.
The function expects no return values.
The spreadsheet is an array of all of the rows of the current spreadsheet being used to run the task. Each element of the array is a single row of the spreadsheet, expressed as an object.
The rowIndex is a number indicating which row of the spreadsheet the task is currently on. This conforms to standard notation in relation to arrays (and numbering schemes in general) in JavaScript i.e. rowIndex = 0 represents the first element in the spreadsheet array.
The screenIndex is a number indicating which screen of the current display the task is currently on. This also conforms to the standard numbering scheme in that screenIndex = 0 indicates the first screen of the display.
The row is an object containing just the information in the current row of the spreadsheet being used to display this screen.
The container is a string which can be used in jQuery requests to uniquely identify the contents of the current screen. Gorilla uses a lookahead system that prepopulates future content in hidden containers on the screen. The container string allows you to select the container currently being used for the screen. This should always be used in jQuery selections that are used to make sure you are collecting elements from the currently presented screen only.
Example usage
In the example above, in the onScreenStart hook, we check to see if the display of the current row matches the string 'task'. Next, we check if the current screenIndex is 0. If both of these return true, we create a string which we then add as html to an element on the screen that we have given the class 'answer-list'. We use the container string to make sure we only select the 'answer-list' element present in the container for the current screen and not any containers that have been prepared (and hidden) by the lookahead.
If you are more familiar with Javascript then you will recognise the notation above for onScreenStart. Simplified this is
The () => {} notation is a shorthand method for expressing a function in Javascript. So, the onScreenStart hook is creating a function, with the set of arguments described above (for which Gorilla automatically provides the values) but where you define the function body.
Click to view a Demo of using onScreenStart to check if the participants' browser is in fullscreen mode.
You're viewing the support pages for our Legacy Tooling and, as such, the information may be outdated. Now is a great time to check out our new and improved tooling, and make the move to Questionnaire Builder 2 and Task Builder 2! Our updated onboarding workshop (live or on-demand) is a good place to start.
onScreenFinish is a hook that is executed when a screen finishes, before loading the next screen in the display. This occurs after participant input has been received, a timeout has triggered or any other effect that results in the screen transitioning. Importantly, this occurs after the correct answer processing - at this stage you know whether or not the participant's response has been recorded as correct or incorrect.
Provided variables
onScreenFinish provides you with six variables. The first five are the same as those for the onScreenStart hook. The sixth is new and unique to this hook.
The function expects no return values.
The spreadsheet variable is an array of all of the rows of the current spreadsheet being used to run the task. Each element of the array is a single row of the spreadsheet, expressed as an object.
The rowIndex variable is a number indicating which row of the spreadsheet the task is currently on. This conforms to standard notation in relation to arrays (and numbering schemes in general) in JavaScript i.e. rowIndex = 0 represents the first element in the spreadsheet array.
The screenIndex variable is a number indicating which screen of the current display the task is currently on. This also conforms to the standard numbering scheme in that screenIndex = 0 indicates the first screen of the display.
The row variable is an object containing just the information in the current row of the spreadsheet being used to display this screen.
The container variable is a string which can be used in jQuery requests to uniquely identify the contents of the current screen. Gorilla uses a lookahead system that prepopulates future content in hidden containers on the screen. The container string allows you to select the container currently being used for the screen. This should always be used in jQuery selections that are used to make sure you are collecting elements from the currently presented screen only.
The correct variable is a boolean which indicates whether the participant's response on the screen was marked as correct or incorrect. If it was marked as correct, the correct variable will be true. If it was marked as incorrect, the correct variable will be false. For screens where there is no response to mark, the default value is false.
Example usage
In the example above, we begin by defining a new variable which we'll use to store the number of points a participant has scored. Then, in the onScreenFinish hook, we check to see if the display of the current row matches the string 'task'. Next, we check if the current screenIndex is 1. Finally, we then check the value of correct. If correct is true, the participant got the answer correct, and we award them 5 points. Otherwise, the participant got the answer wrong, so we award them only 1 point.
Click to view a Demo of using onScreenFinish to check if a participant has made multiple incorrect answers in a row.
You're viewing the support pages for our Legacy Tooling and, as such, the information may be outdated. Now is a great time to check out our new and improved tooling, and make the move to Questionnaire Builder 2 and Task Builder 2! Our updated onboarding workshop (live or on-demand) is a good place to start.
preProcessSpreadsheet is a hook that is executed before the contents of the task spreadsheet have been processed by Gorilla when executing a task. Particularly, this hook is run before Gorilla has carried out any randomisation based on the randomise_trials and randomise_blocks columns in the task spreadsheet. This hook allows you to interact with the uploaded spreadsheet, altering it in ways that may not be accessible using the GUI tools. You could use it to randomly assign trials to one of two (or more) possible stimuli presentations. You could select a subset of trials from the whole spreadsheet. Or, you could alter the whole structure of the spreadsheet to change the task presentation on a per participant basis.
Provided variables
preProcessSpreadsheet provides you with one variable.
The function expects a return value which takes the same form as the spreadsheet variable: an array of objects where each element represents a single row of the spreadsheet.
The spreadsheet variable is an array of all of the rows of the current spreadsheet being used to run the task. Each element of the array is a single row of the spreadsheet, expressed as an object.
Example usage
In the example, (which is taken from the demo linked at the bottom of this page), we begin by defining a new variable, count, which we'll use to store the number of trials (that satisfy certain conditions). In the for loop, we then go through elements of the spreadsheet. For each element, which represents a single spreadsheet row, we look to see if the column Word exists in that row. If it does and if the entry in that column isn't 'Break', we append some text to that column's entry in the row.
After we have completed the loop, we then return the amended spreadsheet to Gorilla.
Also, to access each column in a row, we use the same dot notation that has been discussed before for variables such as row in onScreenStart. For example, if our spreadsheet has a column 'display' (which generally all spreadsheets should have!) we can access it from the spreadsheet variable with
This will retrieve the value in the 'display' column for the first row of the spreadsheet. Note also that the order of rows in the spreadsheet array will match the order of rows in the uploaded spreadsheet, as viewed from the 'Spreadsheet' tab.
Click to view a Demo of using preProcessSpreadsheet to label some text in a trial with the trial's original position in the spreadsheet, before randomisation.
You're viewing the support pages for our Legacy Tooling and, as such, the information may be outdated. Now is a great time to check out our new and improved tooling, and make the move to Questionnaire Builder 2 and Task Builder 2! Our updated onboarding workshop (live or on-demand) is a good place to start.
postProcessSpreadsheet is a hook that is executed after the contents of the task spreadsheet have been processed by Gorilla when executing a task. Particularly, this hook is run after Gorilla has carried out any randomisation based on the randomise_trials and randomise_blocks columns in the task spreadsheet. This is the only difference between this and the preProcessSpreadsheet hook. Otherwise, the functionality and purpose remain the same.
Provided variables
postProcessSpreadsheet provides you with one variable.
The function expects a return value which takes the same form as the spreadsheet variable: an array of objects where each element represents a single row of the spreadsheet.
The spreadsheet variable is an array of all of the rows of the current spreadsheet being used to run the task. Each element of the array is a single row of the spreadsheet, expressed as an object.
Example usage
In the example, (which is taken from the demo linked at the bottom of this page), we begin by defining a new variable, count, which we'll use to store the number of trials (that satisfy certain conditions). In the for loop, we then go through elements of the spreadsheet. For each element, which represents a single spreadsheet row, we look to see if the column Word exists in that row. If it does and if the entry in that column isn't 'Break', we append some text to that column's entry in the row.
After we have completed the loop, we then return the amended spreadsheet to Gorilla.
Also, to access each column in a row, we use the same dot notation that has been discussed before for variables such as row in onScreenStart. For example, if our spreadsheet has a column 'display' (which generally all spreadsheets should have!) we can access it from the spreadsheet variable with
This will retrieve the value in the 'display' column for the first row of the spreadsheet. Note also that the order of rows in the spreadsheet array will not match the order of rows in the uploaded spreadsheet, as viewed from the 'Spreadsheet' tab. This is because this hook is run after Gorilla has carried out any randomisation from the 'randomise_trials' and 'randomise_blocks' columns.
Click to view a Demo of using postProcessSpreadsheet to label some text in a trial with the trial's new position in the spreadsheet, after randomisation.
You're viewing the support pages for our Legacy Tooling and, as such, the information may be outdated. Now is a great time to check out our new and improved tooling, and make the move to Questionnaire Builder 2 and Task Builder 2! Our updated onboarding workshop (live or on-demand) is a good place to start.
onScreenRedirect is a hook that is called when Gorilla is deciding what screen or spreadsheet row to move on to next. Using this hook you can redirect the participant to a different screen/display based on their responses, potentially completely changing the flow of the task as a result.
onScreenRedirect provides you with the same initial set of arguments as onScreenStart: 'spreadsheet', 'rowIndex', 'screenIndex' and 'row'. Additionally it provides 'response': the most recent response given by the participant (the one that caused the screen to end); 'correct': whether the response was marked as correct; 'timeOut': indicating whether the screen ended as a result of a timeout; and 'attempt': the number of attempts the participant made to answer on the screen.
onScreenRedirect expects a return value which takes the form of an object with up to three properties: 'new_screenName': the name of the screen the participant should be moved to next, within the current display; 'new_rowIndex': the index of the row of the spreadsheet the participant should move to next; 'rowIndexRelative': a boolean (true, false) value indicating whether the row index should be considered as relative (true) or absolute (false).
If considered absolute, the participant will be sent to that specific row of the spreadsheet. If you set new_rowIndex to 10 and rowIndexRelative to false, the participant would be sent to the tenth row of the spreadsheet. If considered relative, the participant will be sent forward or backwards the number of places defined by new_rowIndex. If you set new_rowIndex to 10 and rowIndexRelative to true, the participant would be sent forward ten rows in the spreadsheet. Note that, in this use case, new_rowIndex can be set to a negative value - this would result in the participant going back spaces. The latter mode (relative) is quite useful if you want participants to be able to repeat the previous X trials or skip the next X trials, regardless of where they currently are in the spreadsheet as a whole.
If you don't want to change the progression of the task, simply return null and Gorilla will default to progressing normally.
onScreenRedirect allows you to jump to anywhere within the current spreadsheet, giving you a lot of control over the progression of your participant. However, completely subverting Gorilla's own system for displaying task trials which has some potential drawbacks. The most important of these is that Gorilla prepopulates the screen with a few trials worth of data at a time, using the rows in the spreadsheet that it believes are coming next. As onScreenRedirect allows you to jump anywhere in the spreadsheet, it's quite likely that Gorilla won't have these trials prepopulated, so your participants could experience a short pause before moving to the next trials while the content is prepared.
See an example use of the onScreenRedirect hook on this Scripting Library page and in this Gorilla Academy lecture!
You're viewing the support pages for our Legacy Tooling and, as such, the information may be outdated. Now is a great time to check out our new and improved tooling, and make the move to Questionnaire Builder 2 and Task Builder 2! Our updated onboarding workshop (live or on-demand) is a good place to start.
isCorrect is a hook that is run just before finally marking a response as correct or incorrect. Any code that you place in the isCorrect hook will be executed when a response is given or processed on the screen.
Provided variables
isCorrect provides you with seven variables.
The function expects a return value in the form of an object with one property 'newCorrect' which should take a boolean value of either true or false. e.g.
The spreadsheet is an array of all of the rows of the current spreadsheet being used to run the task. Each element of the array is a single row of the spreadsheet, expressed as an object.
The rowIndex is a number indicating which row of the spreadsheet the task is currently on. This conforms to standard notation in relation to arrays (and numbering schemes in general) in JavaScript i.e. rowIndex = 0 represents the first element in the spreadsheet array.
The screenIndex is a number indicating which screen of the current display the task is currently on. This also conforms to the standard numbering scheme in that screenIndex = 0 indicates the first screen of the display.
The row is an object containing just the information in the current row of the spreadsheet being used to display this screen.
The response is a string which is the response given that is currently being marked. This will be the same as the normal response value that would be recorded in the task metrics in the Response column.
The zoneName is a string which corresponds to the name of the zone that the response came from. You can find the names of zones in the Task Builder either by clicking on the 'Show Zone Names' button with a screen selected, or by clicking 'Edit Layout' and then selecting the zone you want the name for. The latter is also the route through which you could change a zone name.
The zoneType is a string which corresponds to the type of zone that the response came from. This will usually be an underscored version of the type as it appears in the Task Builder when selecting a zone type e.g. 'response_text_area'.
Example usage
In the example above, in the isCorrect hook, we check to see if the display of the current row matches the string 'task'. Next, we check if the current screenIndex is 0. If both of these are true, we check the response to see if it is equal to either 'purple' or 'fruit', which are two possible correct answers. If it does, we immediately return an object with a newCorrect property set to true. This will set the participant response to be marked as true.
Click to view a Demo of using isCorrect to score multiple answers as correct.
You're viewing the support pages for our Legacy Tooling and, as such, the information may be outdated. Now is a great time to check out our new and improved tooling, and make the move to Questionnaire Builder 2 and Task Builder 2! Our updated onboarding workshop (live or on-demand) is a good place to start.
This Hook is called after we have pulled the initial settings in that the researcher has set and have begun to build the zone on the screen. It allows you to change a zone's settings on the fly, so you can change things in response to participant behaviour.
This Hook, while extremely powerful, requires substainally more documentation than others do - for every zone it is available in, you need to know the names of all the properties and the settings they correspond to, what values they can take and how to change them safely without breaking your task. As a result, while we wish to make people aware that such functionality exists, it's not quite ready for fuller documentation yet.
If you'd like to know more about this Hook, and if it could enable the functionality you require, please contact Gorilla Support.
You're viewing the support pages for our Legacy Tooling and, as such, the information may be outdated. Now is a great time to check out our new and improved tooling, and make the move to Questionnaire Builder 2 and Task Builder 2! Our updated onboarding workshop (live or on-demand) is a good place to start.
In addition to the hooks, there are functions that you can call from within your hooks to further control the task. Note that you always have access to the regular Gorilla API.
You're viewing the support pages for our Legacy Tooling and, as such, the information may be outdated. Now is a great time to check out our new and improved tooling, and make the move to Questionnaire Builder 2 and Task Builder 2! Our updated onboarding workshop (live or on-demand) is a good place to start.
This function will immediately end the current screen and force progression onto the next screen. Using it, you can alter the normal progression of a task based on your own requirements. You could create custom functionality for a zone or an entirely new zone and use forceAdvance to move on the screen manually. You can also use forceAdvance to change how some response would normally be scored based on your own requirements.
The function can be given two arguments, both of which are optional. The first argument is a boolean which indicates whether the metric that will be generated from the forceAdvance should be marked as correct or incorrect - true for correct and false for incorrect. This will also be used for the purposes of deciding where the participant should progress to next (if the advanced branching settings are used) and what embedded data values should be incremented (if the embedded data settings are used). The second argument is a boolean which indicates whether the metric that will be generated should be marked as a timeout. As with the first argument, this will affect which screen the participant progresses to if the advanced branching settings are used.
The third argument will control the next screen that we go on to, similar to onScreenRedirect. You can pass in the name of the screen to jump to a screen within the current display, or the index of a row if you want to jump to a particular row. If you set jump_to_index_relative to true, you will jump to a row relative to the current row (so setting jump_to_index to -1 in this case would move the participant back one row).
This function should be used with care. With this function you can completely change how the task progresses, which could have significant effects on the participant experience if used incorrectly. You should also be careful of situations where the function could be called multiple times in quick succession, or could be called at the same time as other content on the screen is triggering an advance. This could cause the screen to advance several times successively, resulting in screens being skipped. Gorilla has some safeguards in place to prevent multiple screen progressions from causing an issue, but these may not hold up against the full range of ways in which this function could be used.